How To Replace a Shower Cartridge in 5 Easy Steps
Is your shower cartridge not working as it should? Replacing a shower cartridge is an easy project that almost anyone can do in five simple steps. Before you begin, ensure you have the right tools and materials so you can complete the job quickly and efficiently.
In this post, we’ll share a step-by-step guide to replacing a shower cartridge. We’ll also share some tips and tricks for getting the job done correctly and safely. Plus, we’ll answer some of the most common questions about shower cartridges. Keep reading if you’re ready to learn how to replace a shower cartridge.
Gather Tools and Materials
Before beginning this task, it is critical to have the appropriate tools and materials necessary for the job. You will need a screwdriver set, an adjustable wrench, plumber’s grease, and the new shower cartridge. Having a bucket on hand can be helpful to catch any leaking water.
Shut Off the Water Supply
The next step is to shut off the water supply for the shower. Typically this will be located behind an access panel or on the wall outside of the bathroom. After turning off the water or shutting off the valve, it is best to confirm that no water is running from any of the faucets in your house.
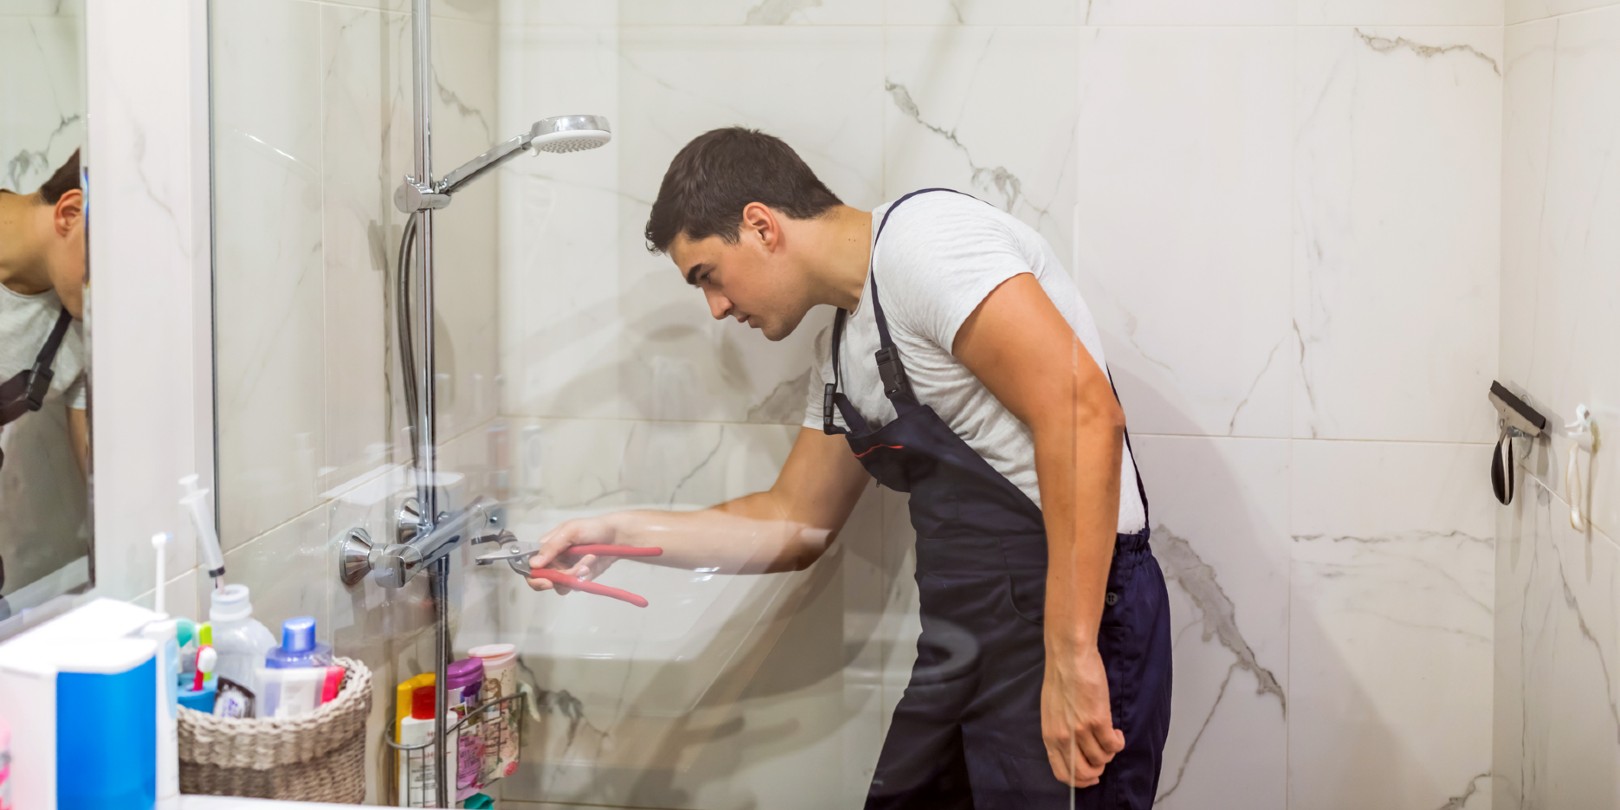
Disassemble the Cartridge
Now that you have gathered the necessary supplies, it is time to take apart your old shower cartridge. Start by removing any face plates or handles covering the cartridge by unscrewing them with your screwdriver. Use an adjustable wrench to carefully unscrew and remove the cartridge from its housing. After removing your old shower cartridge, gently place it aside for later disposal.
Install the New Cartridge
Take the new shower cartridge out of its package and inspect it for any damage or defects before installing it into its housing. Apply a thin layer of plumber’s grease around both sides of the new cartridge before putting it back into its place to ensure a good seal and easier removal when it needs another replacement. Screw it back in using an adjustable wrench until secure. Reattach any faceplates or handles with your screwdriver.
Test the Cartridge
When completing any plumbing project, it is crucial to test your work before putting all your tools away and closing up shop. Turn on the water supply connected to your bathroom and check for water leaks, proper temperature, and flow control in the hot and cold settings.
In addition, it’s essential to know the type of shower cartridge you have in your bathroom so you can select the correct replacement. Generally, shower cartridges use either a quarter-turn or half-turn mechanism (also known as a compression valve), and each type requires a different replacement cartridge.
If you’re still unsure about what type of shower cartridge you need for your bathroom, it’s best to contact a plumbing expert or your local home improvement store. Be sure to bring a picture of the existing parts for the best chance of getting the right cartridge for your bathroom.
Before attempting any repairs, always take the necessary safety precautions and use the right tools for the job. Following these simple steps and tips will help you successfully replace a shower cartridge in no time.
Conclusion
With these five simple steps, you can quickly complete a shower cartridge replacement on your own without contacting a professional plumber in many cases. When dealing with plumbing repairs or maintenance, always use caution when attempting any repair yourself. If needed, contact a certified professional for help if ever unsure about what you’re doing before taking on any problem yourself.