Everything You Need to Know About Using a Belt Sander
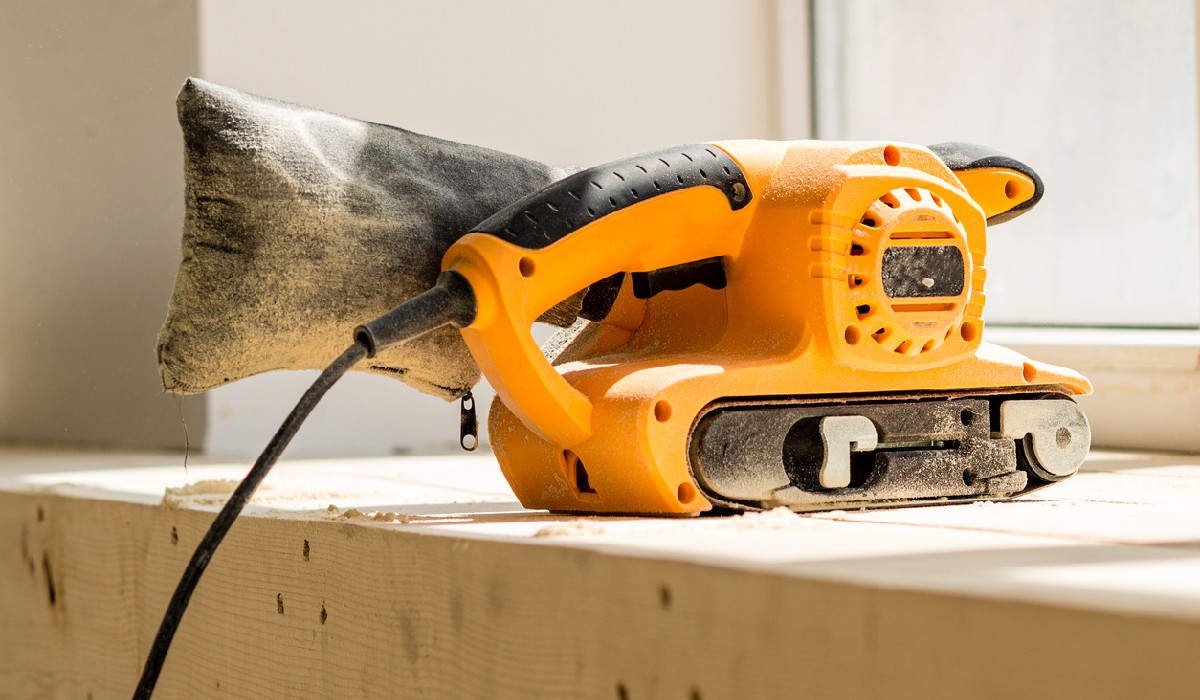
Whether you’re a DIY enthusiast or a professional working in the construction industry, a belt sander is bound to be a must-have tool in your kit. Not only do they allow you to quickly sand broad surfaces, but they can also be used to smooth out rough edges and remove paint, rust, and varnishes.
But getting the most out of a belt sander isn’t easy — you need to know the right tips and techniques to operate it safely and effectively. Let’s discuss everything about using a belt sander, from choosing the right one for your needs to what safety measures are necessary when working with it. We’ll also go through how to use a belt sander correctly and what you can do to avoid injuring yourself or damaging your workpiece.
Types of Belt Sanders
Belt sanders come in a range of sizes and shapes, from large commercial-grade models to small portable versions for everyday use. Depending on your needs, several sanding machines might suit your project.
Stationary Belt Sanders
Stationary belt sanders are larger and more powerful than portable ones. These machines typically consist of two drums where the sanding belt is placed and tensioned. This type of sander is ideal for bigger projects since it can handle thicker pieces of wood and other materials with ease.
Portable Belt Sanders
Portable belt sanders are smaller and easier to use. They tend to be lightweight and have ergonomic handles that make them easier to wield. These sanders are better suited for smaller projects as they may not have enough power to tackle tougher materials.
Benefits of Using a Belt Sander
Using a belt sander is one of the fastest ways to sand larger surfaces and can save time when compared to other methods. These tools produce less dust compared to hand sanding, making them the ideal choice for indoor projects where dust control is important. Belt sanders also provide a uniform finish that can be hard to achieve with other techniques. This benefit makes them particularly suited for woodworking projects where a smooth, even finish is necessary.
Techniques for Sanding
To get the best results with your belt sander, it’s important to understand the right techniques for safe and effective use. Always follow general safety guidelines like wearing protective gear such as gloves and goggles before operating the sander.
When sanding, move the tool in an even motion against the grain of the wood. Start by using a coarse-grit sandpaper and then switch to finer-grit papers successively until you achieve the desired finish. For delicate finishes on small areas, you may need to use an ultra fine-grit.
For more detailed results on larger surfaces, use the sander around any curved edges or hard-to-reach spots first before doing the main surface area. When sanding in tight spots or corners, use an oscillating spindle or detail sander instead as these are better suited for controlled movements on smaller areas without producing too much dust.
Finishing Touches
Once you’ve achieved the desired finish with your belt sander, make sure to go over any rough spots or scratches with a finishing pad or hand block using very fine (220–240 grit) paper before applying any sealants or varnishes. This will ensure that you get an even smoother finish without any blemishes or inconsistencies in texture or color when you apply your top coats.
Conclusion
Using a belt sander is one of the easiest ways to achieve smooth results quickly – just remember to follow safety precautions and understand the correct methods for getting the best results! With these tips in mind, you can make sure that you’re getting perfect finishes whenever using your belt sander.